 411
411
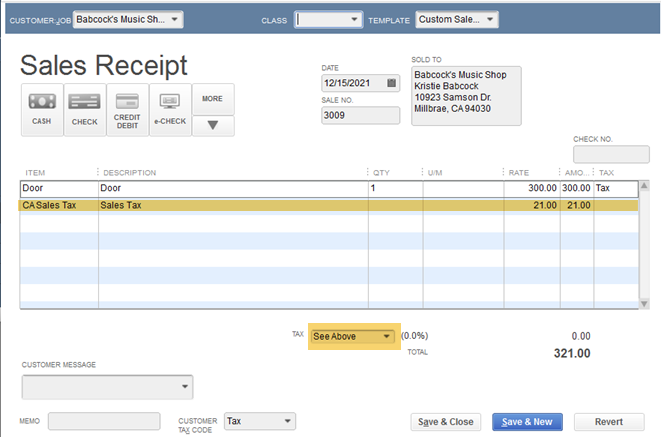
When manually entering sales transactions such as Invoices, Sales Orders or Sales Receipts into QuickBooks, we let QuickBooks calculate the total amount of the sales tax based upon the taxable status of the item and customer and the sales tax item. QuickBooks calculates the amount on the sales transaction behind the scenes and then posts this amount in the footer of the transaction. However, often items when importing sales transactions from e-commerce platforms or shopping carts, the sales tax amount has already been computed. So the question is how do you trick QuickBooks to allow you to post the sales tax item and amount as a line item on the body of the sales transaction.
Review the screen shot below. Essentially, what you do is set up a sales tax item in QuickBooks with the name, See Above. Then, you will be able to use an item called, CA Sales Tax, on the body of the invoice with the dollar amount.

So the next question is how do I import my sales file using Transaction Pro Importer so that the dollar amount in my import file is used on a line item in the sales transaction?
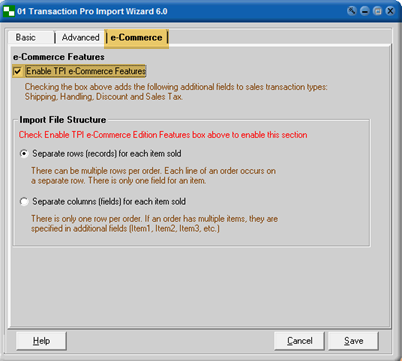
Step 1: Turn on the e-commerce features. Read more here.

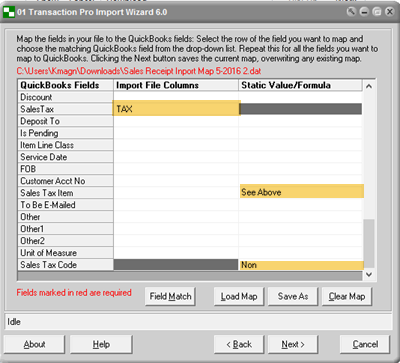
Then, when you get to the Transaction Pro Importer for QuickBooks mapping screen, map the column that contains the tax amount to the QuickBooks Field, Sales Tax. You will then specify default values for both the Sales Tax Item and Sales Tax Code as depicted below.

Then on the e-Commerce options screen, be sure to specify the QuickBooks Tax Account and the QuickBooks Tax Item that you wish to use for recording the tax amounts.
This is not the only way to import sales tax on sales transactions read about all your options here.
.png)
.png)


